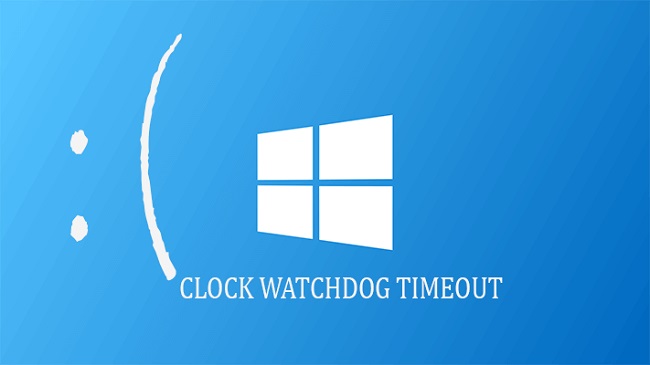
Clock Watchdog Timeout or CLOCK_WATCHDOG_TIMEOUT Blue Screen of Death is the error which forces your system to freeze. You have to reboot to get the PC to work correctly again.
BSODs are a bit little less irritating on Windows 10 as they managed to make it, user-friendly but they are still a big issue. The users who have been working on their essential files and documents may lose their data as the files.
How to Fix Clock Watchdog Timeout on Windows 10, 8 and 7

Some ways to solve the Clock Watchdog Timeout problem are mentioned below, but please try all of them carefully.
Read Also:
Method 1 – Update the BIOS
Any computer’s Basic input-output system (BIOS) is embedded software on the motherboard. It is the first software that your PC loads. It is loaded to use things like CD drives, mice, and keyboards from the moment you turn it on.
So, updating the BIOS can help you to deal with certain issues regarding BSOD. As any type of instability regarding BIOS settings is going to prevent your PC from running or working properly. Have a look at the instructions below:
Step 1 – Firstly, find the current version of the BIOS, which you have installed on the PC. Write msinfo in the search bar at the start menu.
Step 2 – After that, locate the BIOS version under your Processor model. Then copy or rewrite anything to a text file or a piece of the paper.
Step 3 – Next, find whether your computer was pre-build, bundled, or assembled manually after purchasing all the components individually.
(It’s very important because you don’t want to use the BIOS made for one component of the PC when its not applying to the other devices, and then you’ll overwrite the BIOS with a wrong one. This will lead to major errors and also system problems.)
Step 4 – Now, prepare the computer for the update. Make sure that the battery is fully charged if you are using your laptop and then a plugin. It is advisable to use a UPS i.e., Uninterrupted Power Supply if you are updating your computer. UPS is used to make sure that your computer doesn’t turn off in the middle of the update because of a power outage.
Step 5 – Now, there are different instructions to be followed for various desktop and laptop updates.
Method 2 – Stop Overclock
Overclocking your CPU mostly causes these types of errors. You should all know that processor problems cause CLOCK_WATCHDOG_TIMEOUT Blue Screen of Death. Therefore you should check this out.
Overclocking is a process where you change the speed and frequency of the processor to a higher value, above all factory settings. It can give the PC a good amount of boost. But you have to be careful.
It’s because there were occasions where entire PCs go down in flames after users overclocked them. Or because they were careless.
Returning your CPU frequency to its normal state depends upon the software used to overclock in the first place.
Intel, as well as AMD, have their application available to download. This application lets the users overclock their CPUs. But users can choose from many of the available programs.
First, stop overclocking your PC and then check that if Clock Watchdog Timeout error comes again.
Method 3 – Use External Speakers
This method is for users that have two pairs of speakers (both internal and external ones). In that case, this issue can occur when Windows tries to swap between the internal and external speakers.
Although it’s fixable, you may not be able to use the internal speakers after disconnecting the other pair. Follow the below steps to fix this issue:
Step 1 – First of all, go to the volume icon, which is located at the bottom right of your desktop. Right-click on it and then click on the playback devices.
Step 2 – Now, Sound settings is going to open up—Right-click on the pair that you wish to disable and then click on Disable.
Step 3 – Next, check that the other speaker is working correctly. As you can’t play sound if both the speakers start malfunctioning.
Step 4 – Finally, reboot your PC and check that the Clock Watchdog Timeout issue is solved or not.
Method 4 – Provide A Kernel Memory Dump
A kernel memory dump can be easily read by the IT specialists with a Windows debugger. It will instantly show just where the issue is and how to remove it. Also, the tool can be run easily with the Command Prompt.
Step 1 – Firstly, search about command prompt in the search bar. Then, right-click on it and select Run as administrator option.
Step 2 – Now, type or copy and paste the following command in the Command Prompt. Then hit the enter button:
Verifier.exe /standard /all
Step 3 – Furthermore, this process is going to trigger the Blue Screen of Death (BSOD) and record a log file whose location is in C:\Windows\Minidump\ folder.
Step 4 – Now, it can be a bit difficult to open. But there are some debugging tools through which you can sort this issue. To do so, you can download them from here. Locate it in the Debugging Tools for the Windows 10 (WinDbg) section in the Get Debugging Tools for Windows (WinDbg).
Step 5 – After downloading the SDK file, ensure that you deselect all the things. (except Debugging Tools for the Windows from installation wizard if you don’t want to use any other Windows application.)
Step 6 – Then, find the tool after installing it under the name of windbg and then run it.
Step 7 – After that, navigate to the File and Open the Crash Dump. Then find the minidump file, which is located in the C: Windows\Minidump\Folder.
Step 8 – Then, look at the bottom of the file, which has opened. And in it, you will see a line which says Caused by. So, this is a good sign of which driver is causing the error.
Step 9 – At last, uninstall the driver from the device manager. It can be done by right-clicking on the driver and then tap on Uninstall the Device. Also, ensure that the device is connected beforehand.
There is also an option of updating the driver if you don’t want to install it again.
Method 5 – Reset the BIOS to Default
If your BIOS is updated already. Or if you are worried that something may go wrong in the installation process, then resetting BIOS is a good option. So, follow the below-mentioned steps to reset your BIOS:
Step 1 – At first, reboot the PC and then click on the F8 button to open the BIOS.
Although, it’s not necessary for the F8 key in all cases. But please ensure that you click the button in the message at the bottom of the boot screen. (the one at which the logo and the name of your PC manufacturer is listed):
Press__to run Setup
Step 2 – Now, BIOS settings are not the same for all the manufacturers. But ensure that you are familiar with the controls because you cannot use a mouse in the BIOS.
Step 3 – The first and foremost method is to try and locate the button for the Setup Defaults option. Click on the Enter when it is prompted.
Step 4 – And if this isn’t listed, go to the Exit tab in BIOS and then select the Load Setup Defaults option. Then, click on the Enter Button when prompted.
Step 5 – Next, go to the Exit Saving Changes option and allow your computer to boot.
Step 6 – In the end, check that if the Clock Watchdog Timeout issue is resolved or not.
Method 6 – Check If the CPU is Faulty
If your CPU has a fault and it is experiencing errors by itself, then the time has come to replace it. But this can be an expensive decision. Although, it’s worth it as it is going to make your computer stable.
First of all, get the CPU check by an IT expert, and then they will find if there is any fault in your CPU. In case the fault is present, then listen to their suggestion about which model is suiting your Setup.
Method 7 – Uninstall Virtual Image Managers
Programs like Daemon Tools and Alcohol 120% are used to make virtual disks and images to manage the ISO files. Most of these tools have linked to BSOD. Hence, it’s advised to install them for the time being. Or to replace one of them with an alternative like replacing Daemon Tools with Alcohol 120%.
Step 1 – Firstly, type settings in the search box and then click on the topmost result.
Step 2 – Then, open the Apps section. Find the program you want to uninstall and then tap on uninstall.
Step 3 – Now, follow the instructions displayed on the screen to run the uninstall wizard.
Read Also:
Conclusion
I hope this article proves useful to you. Read with an alert mind. Thank you for reading!


